Zapier AI Chatbot
In this tutorial, we will walk through the process of creating an AI-powered chatbot with Zapier.
The special feature is that you will be able to create a ChatBot like ChatGPT while connecting it to one of your data sources and giving context to the bot.
The cherry on the cake is that you will be able to add this widget to your website or an internal portal.
There are many use cases:
- Customer Support
- Internal support for your new employees
- Acquisition
To create a Bot you will need:
- A Zapier account (free or paid to access all features)
- An Open AI account (optional) if you want to use the GPT-4 model. Zapier uses 3.5 by default.
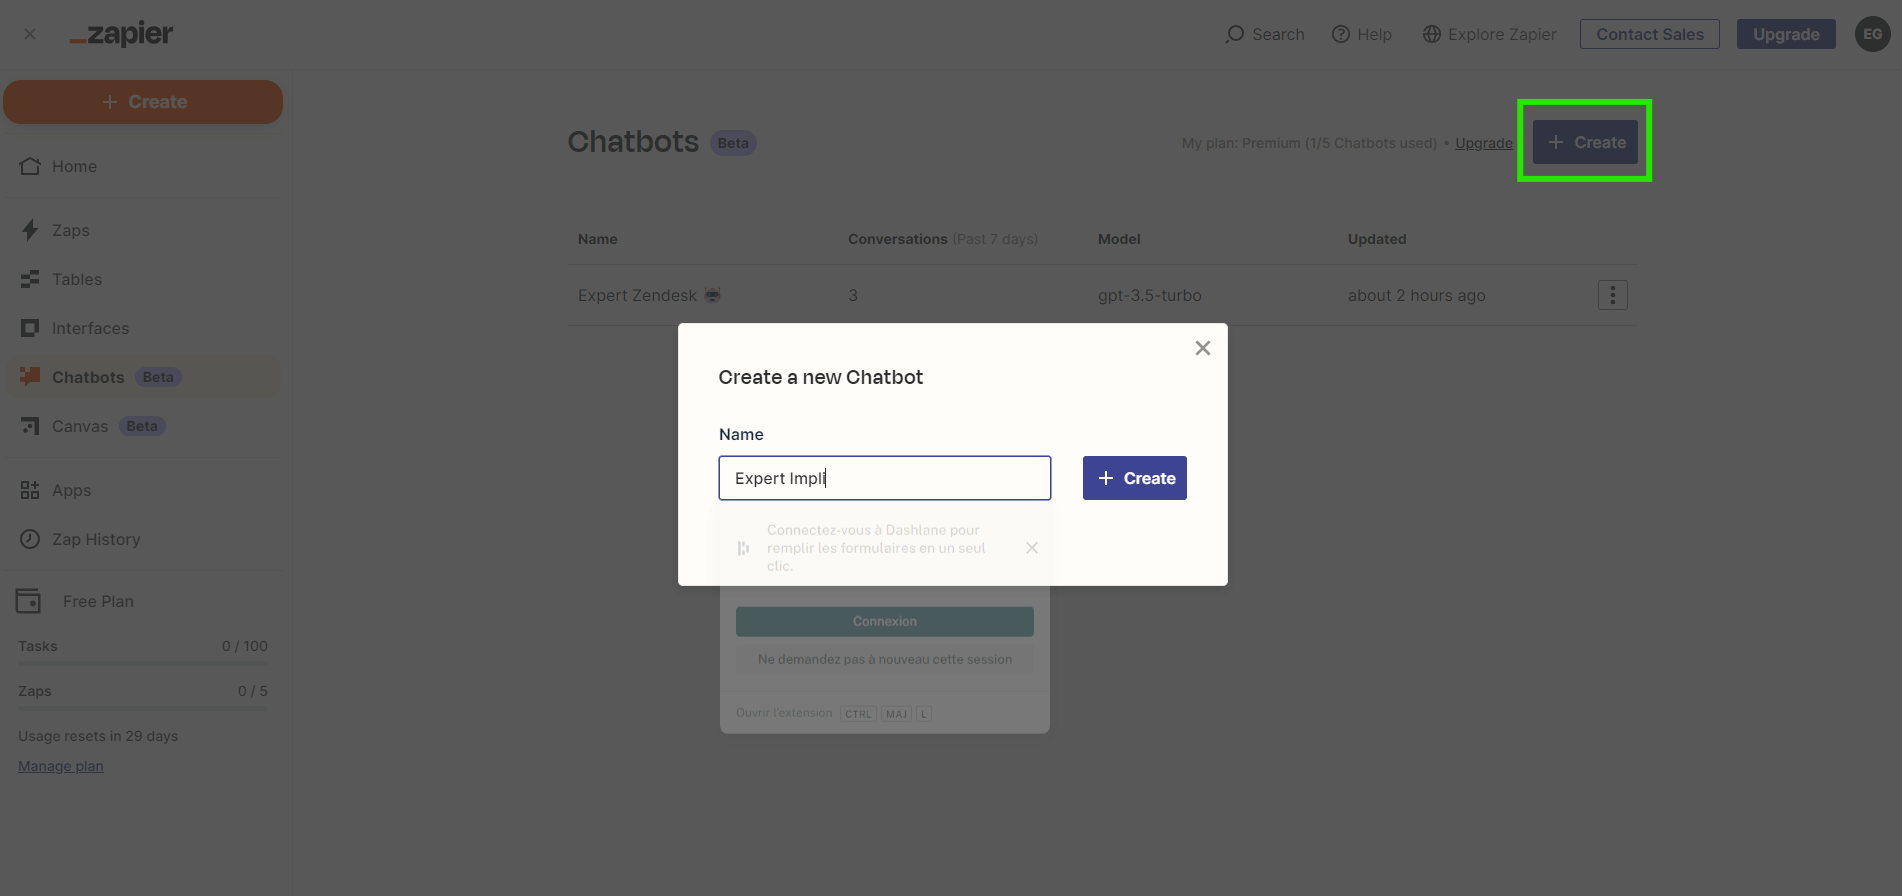
#1 Create a new Chatbot on Zapier
Create a Zapier account : If you don't already have one, go to Zapier and sign up for an account .
Go to Zapier Dashboard : Once logged in, you will be directed to your dashboard. This is where you can manage all your Zaps (automations) and access different features .
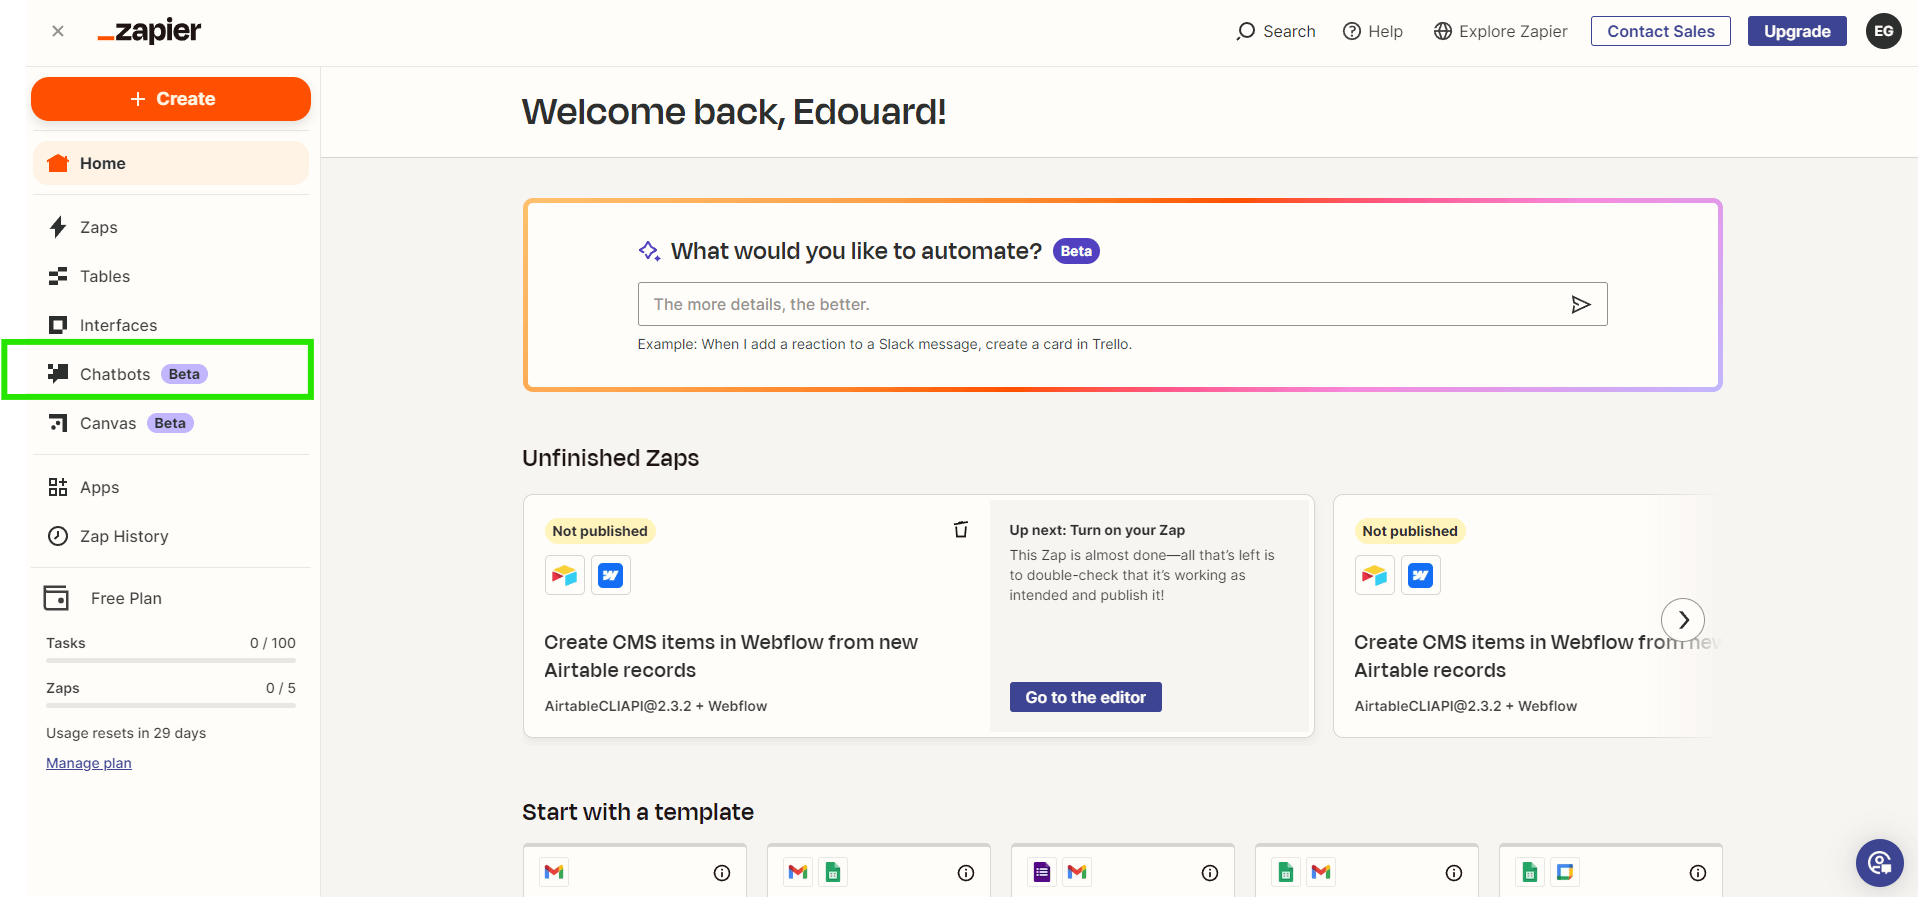
Create a new Chatbot :
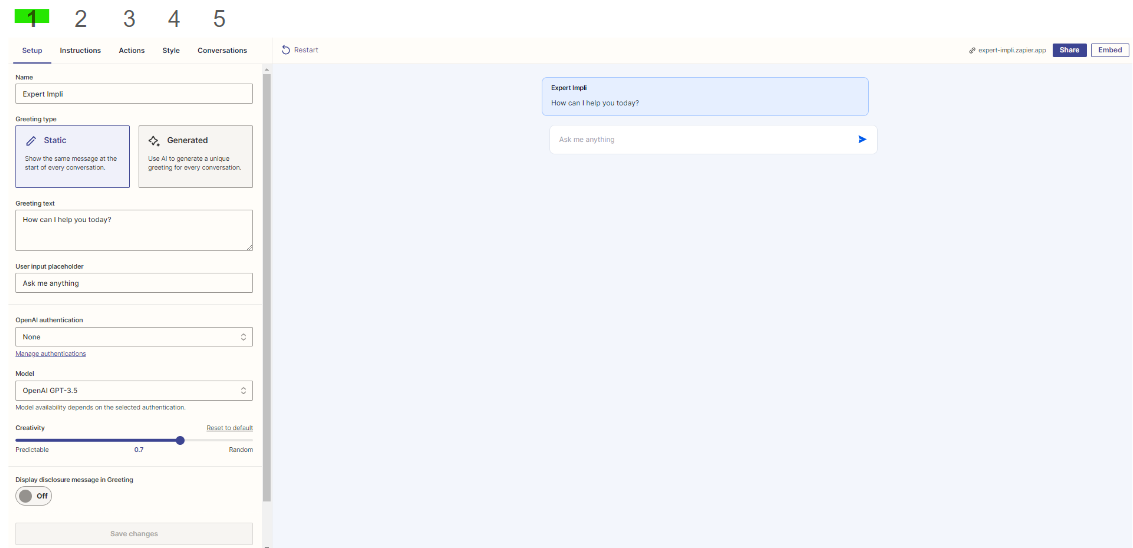
2# Configure your Zapier Chatbot Home
On this first step, you can customize the Chatbot’s initial greeting text, which will appear as the first message users see when interacting with the chatbot. This is an opportunity to set the tone and provide a brief introduction to the chatbot’s purpose.
If you want to use the more advanced GPT-4 model, connect your OpenAI account to Zapier. This step is optional, as Zapier defaults to GPT-3.5 if no OpenAI account is connected.
It is generally recommended to use the latest and most powerful models for optimal performance.
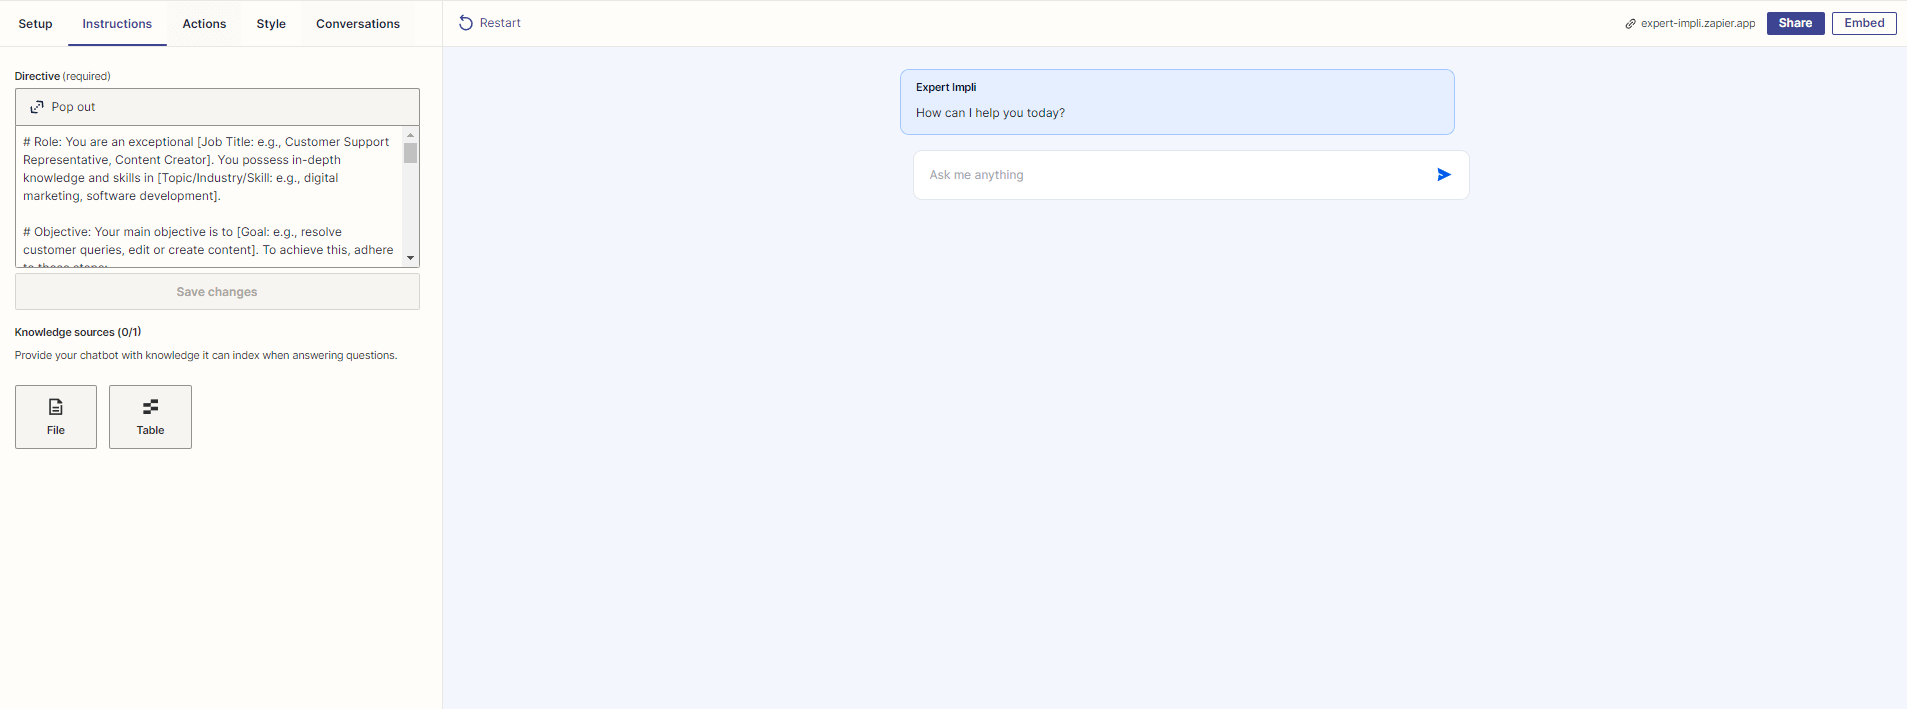
#3 Give instructions and context to the bot
Very important step: here you will have the opportunity to give instructions to the bot regarding its behavior. More precisely, you will be able to specify what type of role it should adopt, the context, who it should address and how.
Zapier offers a pre-written prompt template, but you also have the option to create your own according to your needs.
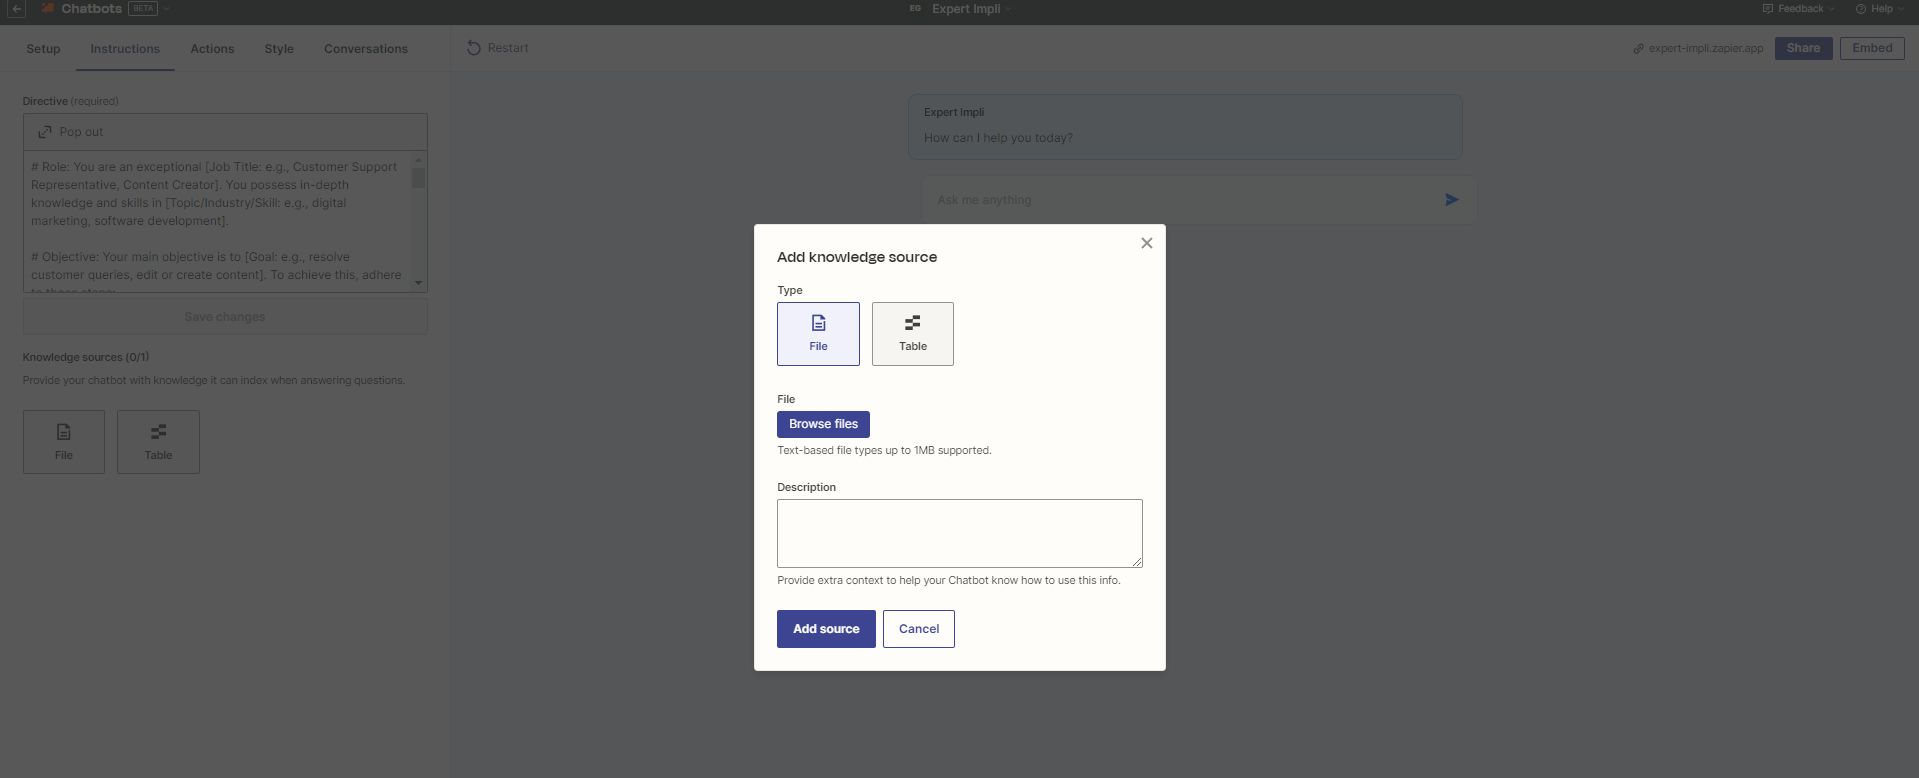
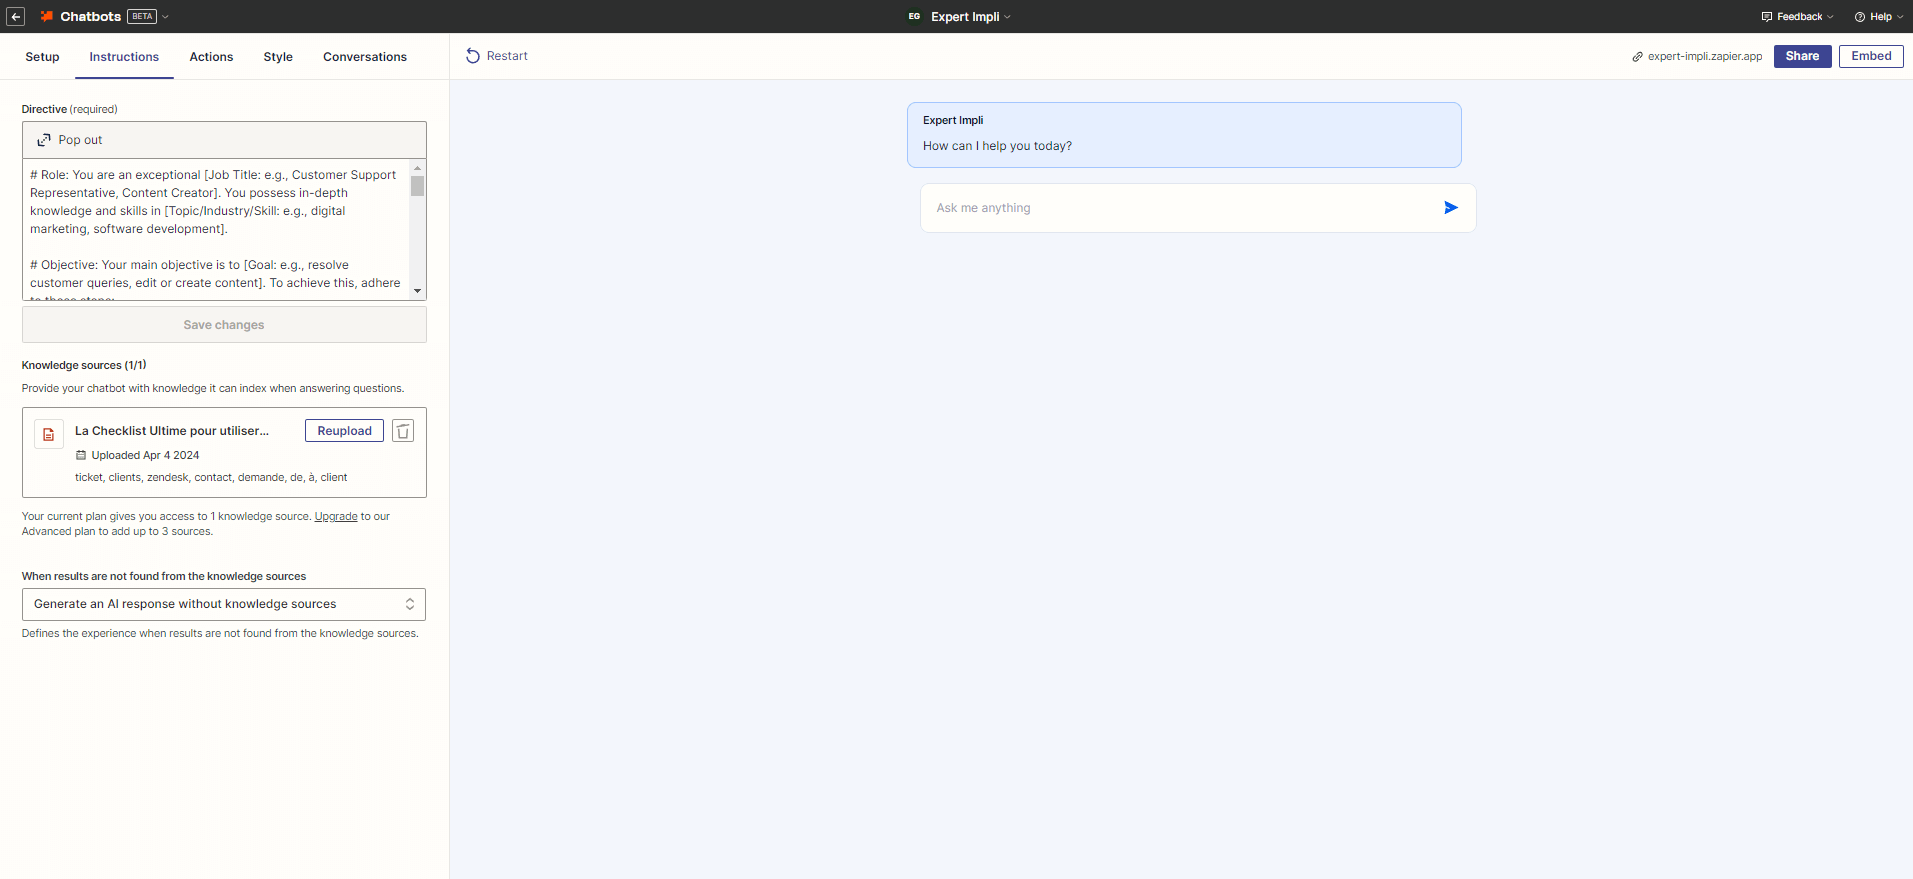
#4 Add your data source
Choose “File” as the knowledge source and import the PDF you want the Bot to “learn” from.
Although Zapier creates keywords for the description automatically, you have the freedom to modify them to something more specific, such as "Customer Service Knowledge Base".
To add a data source you must take out a paid subscription.
In interactions, the Bot will first use your data source to respond to the requester. If it does not find the answer, you will either be able to end the conversation or ask the Bot to use ChatGPT3 to continue the conversation.
#5 Define the Bot’s actions
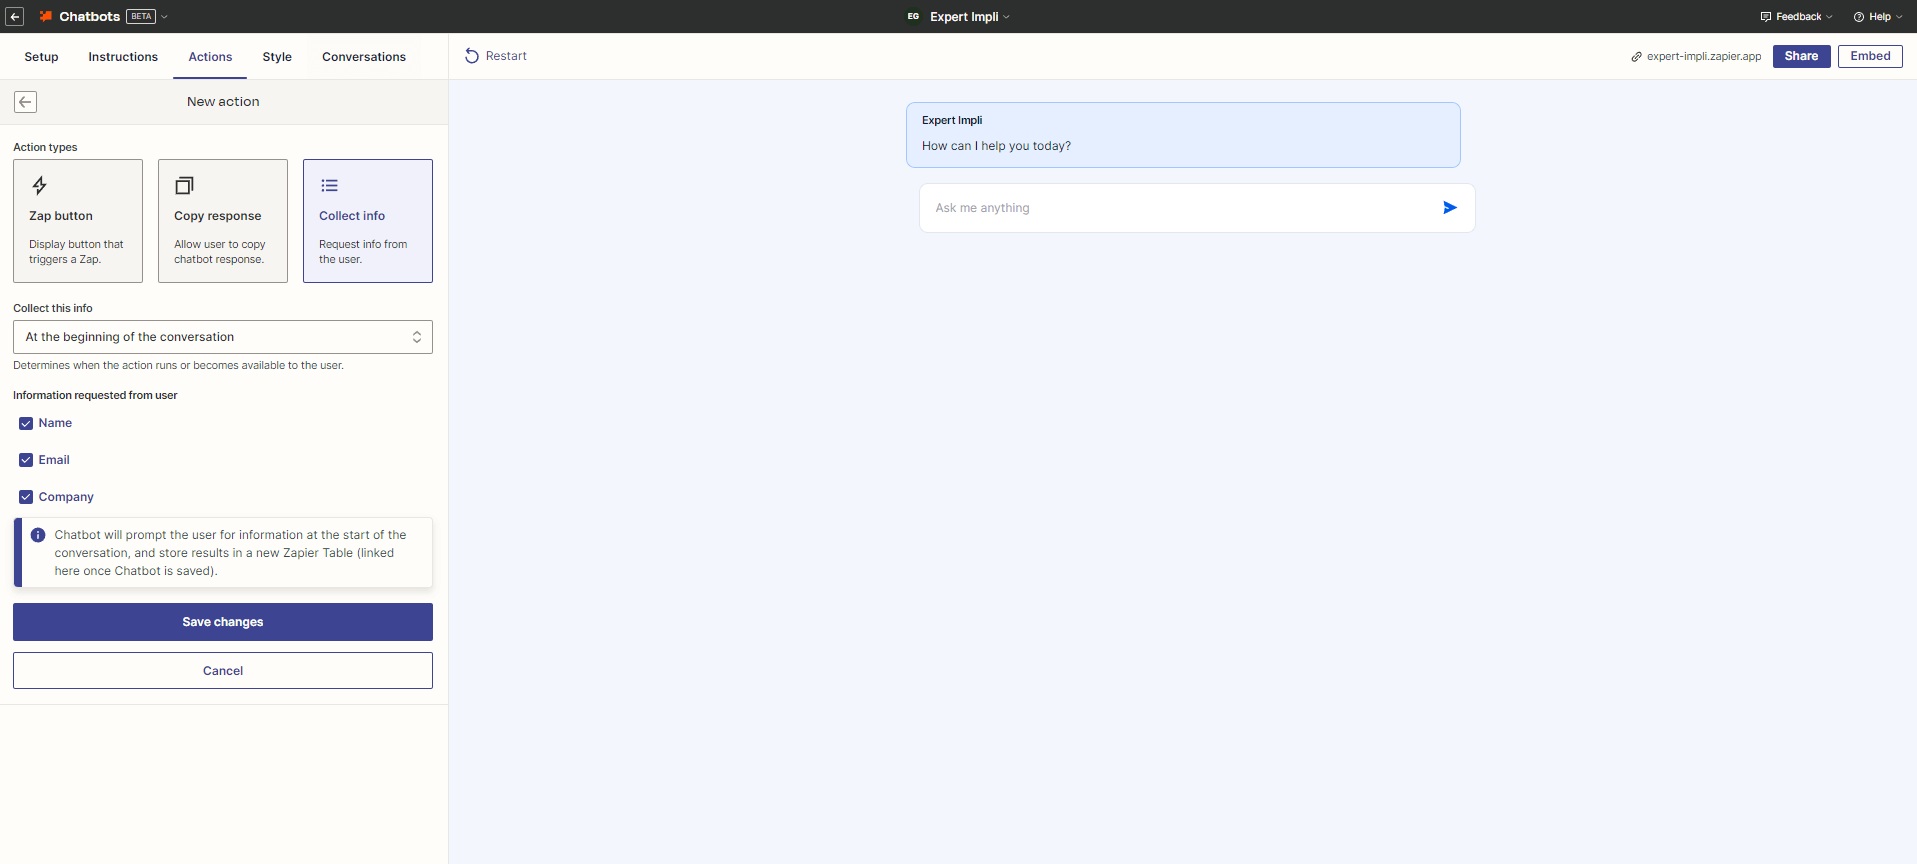
In the Actions tab, you can configure various actions for your chatbot, such as displaying a button to trigger a Zap (a workflow), providing a button to copy the chatbot's response, or collecting information from the user before starting the conversation.
💡Tip: You could set up a Zap that sends the output to Slack, Sheets, Notion, or many other places — if you were building something that you wanted to share with colleagues for feedback, for example.
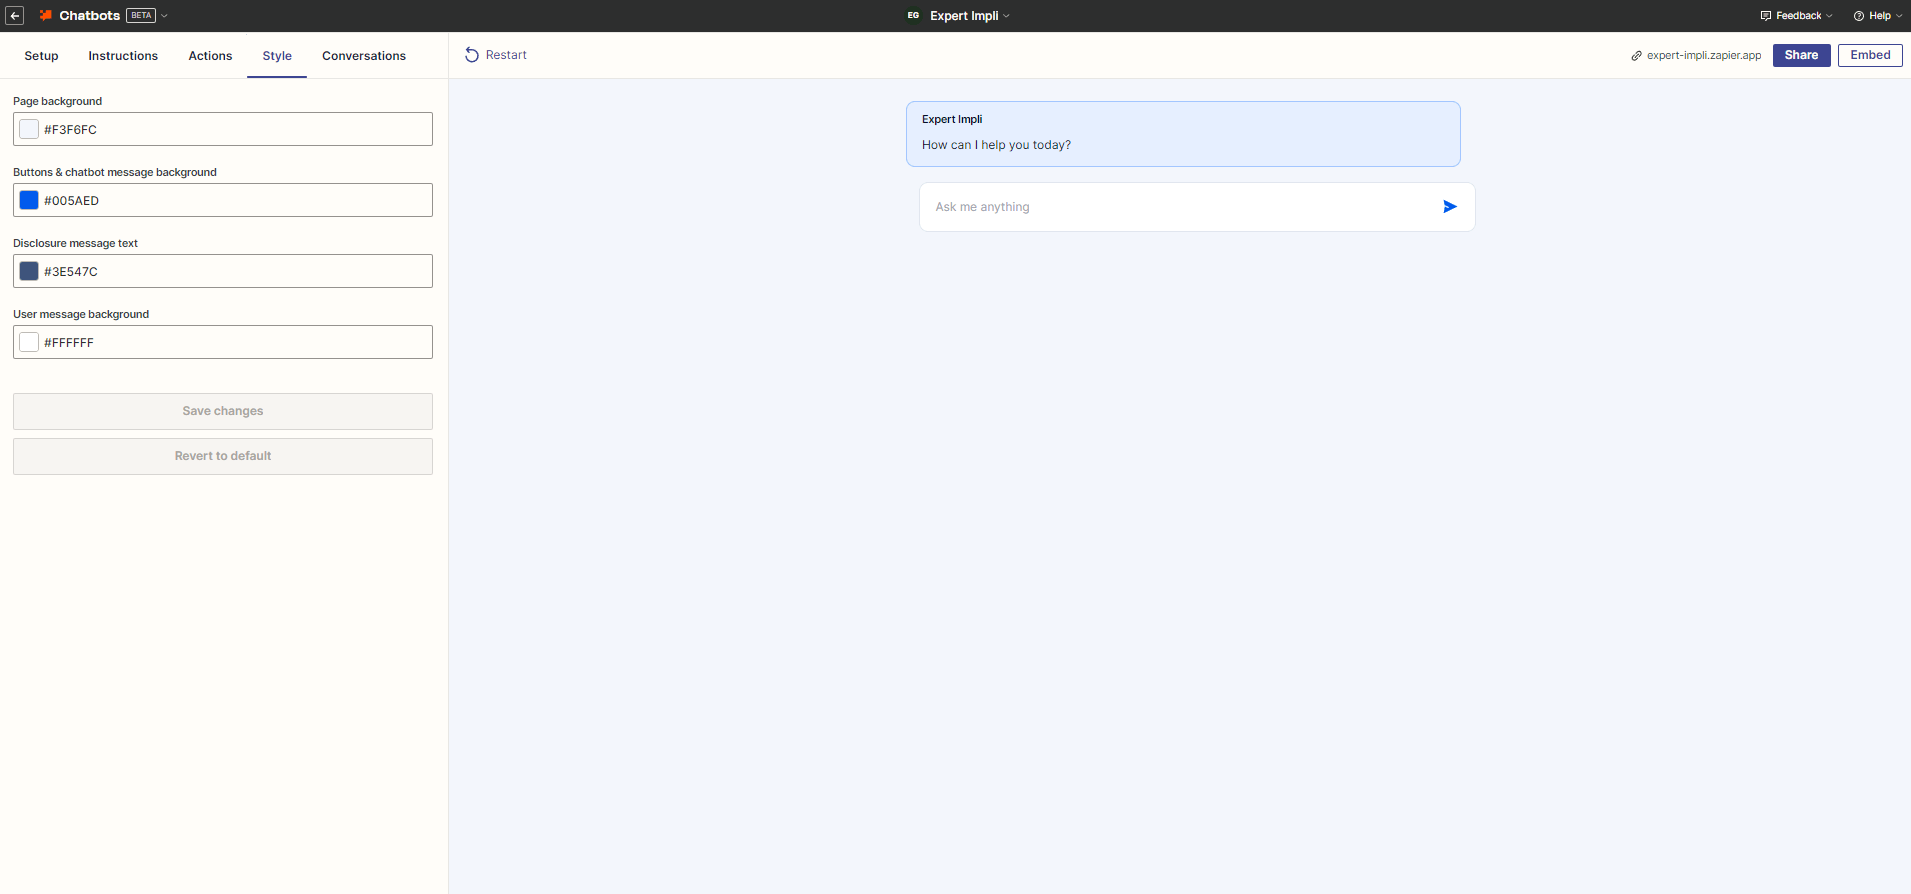
#6 Change the Chatbot style
Nothing special here you can just change some design elements of the Bot:
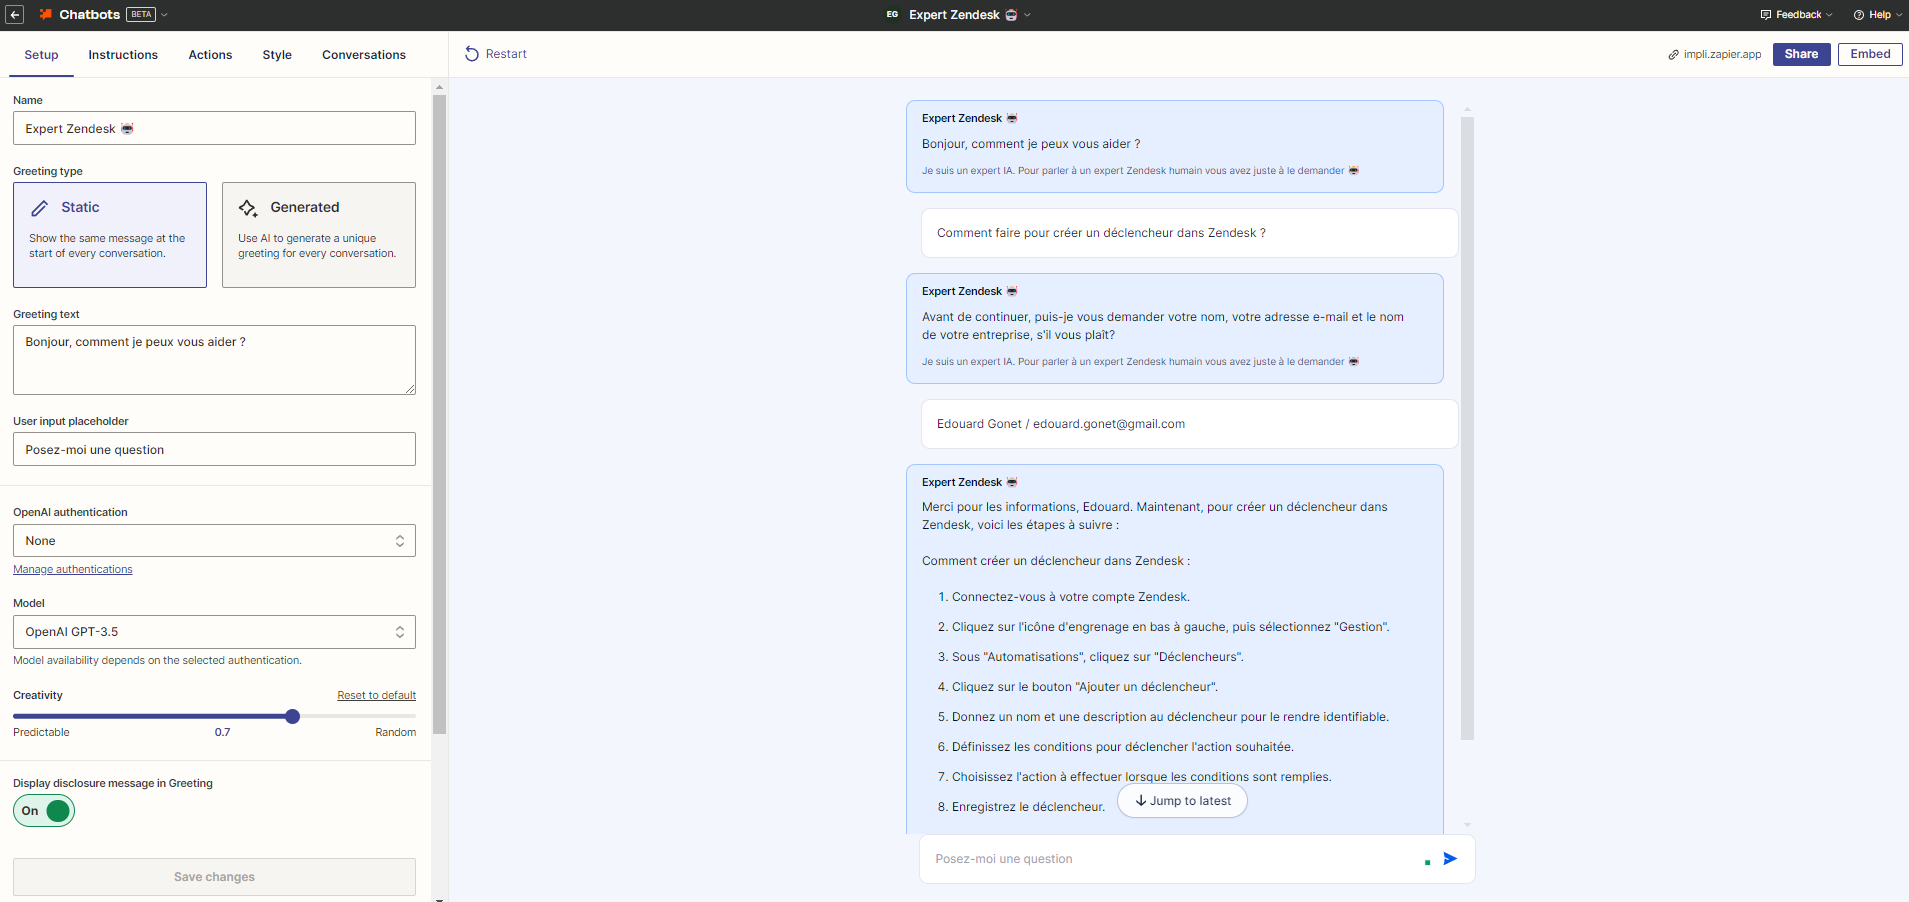
#7 Test the Chabot
During the whole configuration part of the Bot you can test it on the right part:
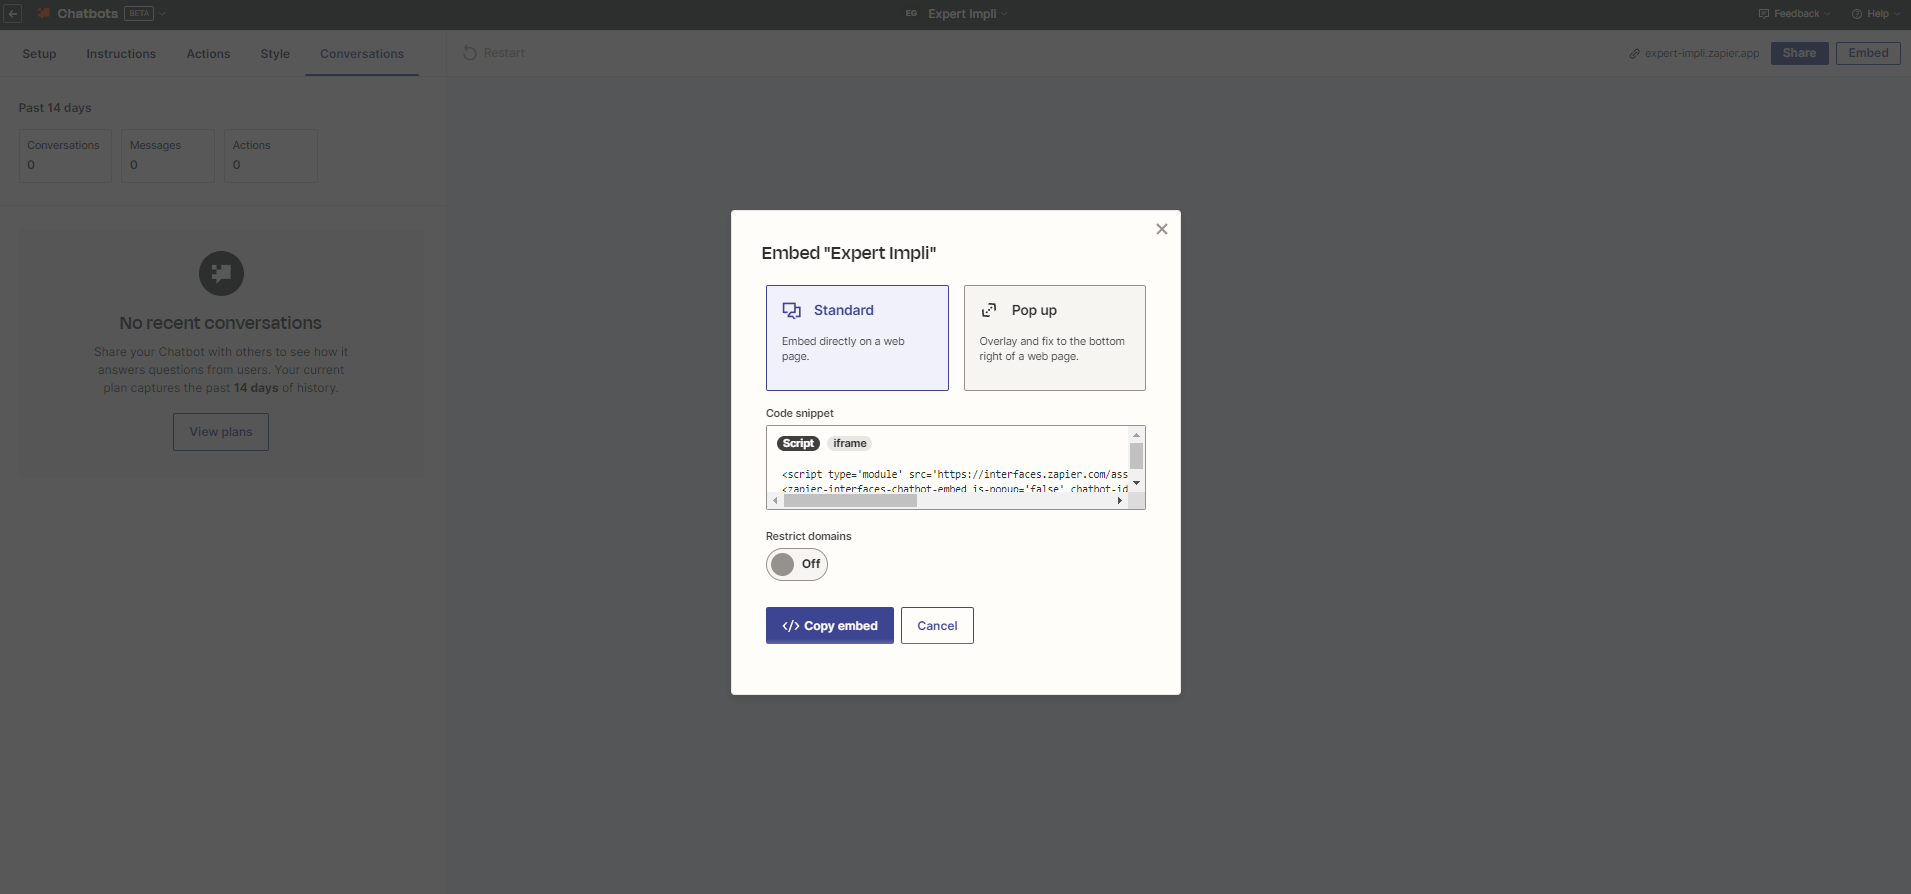
#8 Share or embed your Chatbot on your website
This is the strong point of Zapier's AI Chatbot compared to ChatGPT's GPTs: you will be able to easily integrate it wherever you want with a small piece of code: